方案一:使用主题文件
定义换肤资源
在values/下新建一个xml文件,比如theme_attrs.xml,然后定义换肤的资源类型
<?xml version="1.0" encoding="utf-8"?>
<resources>
    <attr name="theme_main_color" format="color|reference" />
    <attr name="theme_sub_color" format="color|reference" />
    <attr name="theme_main_bg" format="reference" />
</resources>
在主题中定义具体的资源
修改项目中已有的主题文件,定义我们的皮肤资源,因为主题是可以继承的,所以我们直接继承,然后修改我们需要自定义的即可,如下面的Theme.Style1
<resources xmlns:tools="http://schemas.android.com/tools">

    <style name="Theme.Default" parent="Theme.MaterialComponents.DayNight.DarkActionBar">
        <item name="theme_main_color">@color/purple_500</item>
        <item name="theme_sub_color">@color/purple_200</item>
        <item name="theme_main_bg">@mipmap/bg1</item>
    </style>

    <style name="Theme.Style1" parent="Theme.Default">
        <item name="theme_main_color">@color/purple_500</item>
        <item name="theme_sub_color">@color/teal_200</item>
        <item name="theme_main_bg">@mipmap/bg2</item>
    </style>
</resources>
布局中使用
在布局中使用?attr/xxx的形式去引用主题中的实际资源
<TextView
android:layout_width="match_parent"
android:layout_height="50dp"
android:background="?attr/theme_main_color"
android:gravity="center"
android:text="这是一个文本"
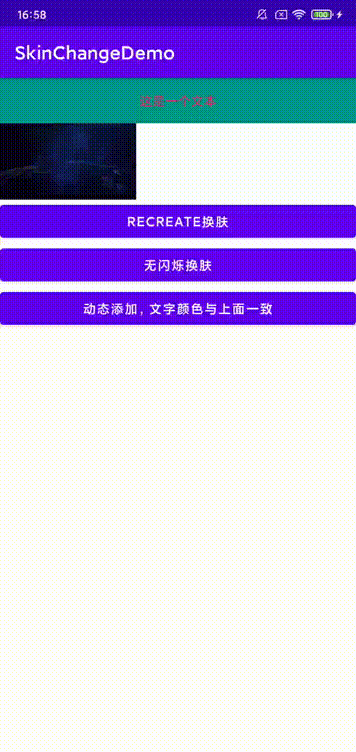
android:textColor="?attr/theme_sub_color" />换肤
我们需要在setContentView之前设置我们的主题即可
override fun onCreate(savedInstanceState: Bundle?) {
    super.onCreate(savedInstanceState)
    if ("default" != getSp(this, "theme")) {
        setTheme(R.style.Theme_Style1)
    }
    setContentView(R.layout.activity_demo1_theme)
}
这个时候就会存在一个问题,当我们换肤设置了setTheme以后,需要重新创建Activity才会生效
1、使用recreate()方法重新创建Activity
fun onChangeTheme(view: View) {
    toggleTheme()
    recreate()
}
缺点:画面会闪烁一下,体验上无法接受
2、无闪烁重启Activity
fun onChangeTheme2(view: View) {
    toggleTheme()
    val intent = intent
    intent.addFlags(Intent.FLAG_ACTIVITY_NO_ANIMATION)
    finish()
    overridePendingTransition(0, 0) //不设置进入退出动画
    startActivity(intent)
    overridePendingTransition(0, 0) //不设置进入退出动画
}
以上两种方式都会导致界面状态丢失,避免方案咱们后面再讲
动态添加控件支持
很多时候,我们的控件并不是直接在xml中的,需要在运行时,使用addView添加到试图中,这个时候就需要我们手动应用主题属性了
fun onAddView(view: View) {
    val textView = TextView(this)
    textView.text = "动态添加的控件"
    textView.setTextColor(
        getThemeColor(
            this,
            R.attr.theme_sub_color,
            Color.BLACK
        )
    )
}
1、方案一:使用obtainStyledAttributes获取属性值
/**
 * 获取主题属性的资源id
 */
fun getThemeColor(context: Context, attr: Int, defaultColor: Int): Int {
    val obtainStyledAttributes = context.theme.obtainStyledAttributes(intArrayOf(attr))
    val redIds = IntArray(obtainStyledAttributes.indexCount)
    for (i in 0 until obtainStyledAttributes.indexCount) {
        val type = obtainStyledAttributes.getType(i)
        redIds[i] =
                //
            if (type >= TypedValue.TYPE_FIRST_COLOR_INT && type <= TypedValue.TYPE_LAST_COLOR_INT) {
                obtainStyledAttributes.getColor(i, defaultColor)
            } else {
                defaultColor
            }
    }
    obtainStyledAttributes.recycle()
    return redIds[0]
}
2、方案二:使用TypedValue获取
/**
 * 获取主题属性的资源id,方案二
 */
fun getThemeColor2(context: Context, attr: Int, defaultColor: Int): Int {
    val typedValue = TypedValue()
    val success = context.theme.resolveAttribute(
        attr,
        typedValue,
        true
    )
    return if (success) {
        if (typedValue.type >= TypedValue.TYPE_FIRST_COLOR_INT
            && typedValue.type <= TypedValue.TYPE_LAST_COLOR_INT
        ) {
            typedValue.data
        } else {
            defaultColor
        }
    } else {
        defaultColor
    }
}-
TypedValue字段解析
针对#ffffff 这种指定值,data就为这个色值,resourceId为0
针对@color/black,data为这个色值,resourceId为 R.color.black(整形)
针对@drawable/XXX,data不能直接用,resourceId为 R.drawable.XXX(整形),type为TypedValue.TYPE_STRING,string字段为文件名
使用主题文件方案缺点:
1、当界面重启以后,界面状态会丢失
2、整体改造为attr形式,较为繁琐
方案二:LayoutInflater#setFactory2
既然使用setTheme方案都需要重新创建Activity,那么其实我们也可以自己找到所有需要换肤的控件,然后手动设置就可以完成换肤了,这种方案代表框架Android-Skin-Loader,不过可惜很久没有更新了
大致步骤如下:
1、收集需要换肤的控件以及属性
2、制作皮肤包
3、读取皮肤包
4、动态刷新控件
5、其他:支持手动设置属性,手动添加控件
其实我们查看LayoutInflater#createViewFromTag源码即可知道,系统在创建View之前会使用LayoutInflater#tryCreateView去看看外部是不是想自己创建控件,具体会调用外部设置的Factory2#onCreateView,如果返回null,则系统去创建,那么我们就可以在这个里面解析对应控件的属性,如果是支持换肤的属性,则创建自己手动控件,并保存
收集需要换肤的控件以及属性
首先将我们的LayoutInflater.Factory2设置进去,这里使用LayoutInflaterCompat来保证兼容性
override fun onCreate(savedInstanceState: Bundle?) {
    LayoutInflaterCompat.setFactory2(layoutInflater, layoutFactory2)
    super.onCreate(savedInstanceState)
    setContentView(R.layout.activity_demo2_theme)
}然后就是在LayoutInflater.Factory2执行我们的逻辑,首先判断控件是否设置了允许换肤的属性(其实非必须,只是为了提升效率),然后读取属性名,如果我们支持,则继续读取属性的值,这里需要兼容直接写色值、使用?attr/xxx形式,以及@color/xxx,然后将其包装
private val layoutFactory2 = object : LayoutInflater.Factory2 {

    val attrViews: MutableList<AttrView> = mutableListOf()

    override fun onCreateView(parent: View?, name: String, context: Context, attrs: AttributeSet): View? {
        val obtainStyledAttributes = context.obtainStyledAttributes(attrs, R.styleable.SkinSupport)
        val isEnable = obtainStyledAttributes.getBoolean(R.styleable.SkinSupport_enableSkin, false)
        obtainStyledAttributes.recycle()
        var createView: View? = null
        //如果控件支持换肤
        if (isEnable) {
            //调用系统方法创建控件
            createView = delegate.createView(parent, name, context, attrs)
            val attrView = AttrView(createView)
            for (i in 0 until attrs.attributeCount) {
                val attributeName = attrs.getAttributeName(i)
                //如果是支持换肤的属性
                if (isSupportAttr(attributeName)) {
                    val attributeValue = attrs.getAttributeValue(i)
                    //# 直接写死的颜色 不处理
                    //?2130903258 ?colorPrimary 这样的 解析主题,找到id,再去找资源名称和类型
                    //@2131231208 @color/red 直接就是id,根据id找到资源名称和类型
                    if (attributeValue.startsWith("?")) {
                        val attrId = attributeValue.substring(1)
                        val resIdFromTheme = getResIdFromTheme(context, attrId.toInt())
                        if (resIdFromTheme > 0) {
                            attrView.attrs.add(AttrItem(attributeName, resIdFromTheme))
                        }
                    } else if (attributeValue.startsWith("@")) {
                        attrView.attrs.add(AttrItem(attributeName, attributeValue.substring(1).toInt()))
                    }
                }
            }
            attrViews.add(attrView)
        }
        return createView
    }

    /**
     * 解析主题,找到资源id,其实就是方案一里面的方法
     */
    private fun getResIdFromTheme(context: Context, attrId: Int): Int {
        val typedValue = TypedValue()
        val success = context.theme.resolveAttribute(attrId, typedValue, true)
        //typedValue.resourceId 可能为0
        return typedValue.resourceId
    }

    private fun isSupportAttr(attrName: String): Boolean {
        if ("textColor" == attrName || "text" == attrName) {
            return true
        }
        return false
    }
}
这里其实主要关注点如下
1、如何创建View
使用delegate.createView(parent, name, context, attrs),委托给系统的实现,保证兼容性
2、如何读取?attr/xxx形式
如同方案一中,使用TypedValue读取即可
补充封装类
//包装一个属性
private class AttrItem(val attrName: String, val resId: Int)
//包装一个支持换肤的控件
private class AttrView(val view: View, val attrs: MutableList<AttrItem> = mutableListOf())
制作皮肤包
制作皮肤包也很简单,只需要新建一个Phone类型的Module即可,然后执行assembleRelease命令即可,这里需要注意的是,因为皮肤包只需要资源文件,所以各种代码依赖都需要删除掉,打包以后观察下app包的大小以及里面的dex文件内容即可。哪里多余删除哪里
读取皮肤包
读取外部apk资源网上代码已经非常多了,就不在多说了,主要是将外部的apk的路径添加到AssetManager,然后创建Resources对象,当我们换肤的时候,就是在这个Resources对象中寻找资源文件并替换
fun loadResource(context: Context, skinPath: String) {
    try {
        val packageArchiveInfo = context.packageManager.getPackageArchiveInfo(skinPath, PackageManager.GET_ACTIVITIES)
        if (packageArchiveInfo == null) {
            Log.w(TAG, "loadResource: app load fail")
            return
        }
        skinPkgName = packageArchiveInfo.packageName
        val assetManager = AssetManager::class.java.newInstance()
        val method = AssetManager::class.java.getMethod("addAssetPath", String::class.java)
        method.invoke(assetManager, skinPath)

        resource = Resources(assetManager, context.resources.displayMetrics, context.resources.configuration)
    } catch (e: Exception) {
        Log.e(TAG, "loadResource: ", e)
    }
}
动态刷新控件
要想刷新控件也非常的简单,因为我们在第一步中已经找到了所有需要换肤的控件,以及每一个控件的属性、属性id,当换肤的时候,直接遍历这个列表,然后去皮肤包中寻找同名的资源设置给控件即可完成换肤
fun changeSkin(context: Context) {
    //这个是在Factory2中找到的所有支持换肤的控件
    attrViews.forEach {
        changAttrView(context, it)
    }
}

fun changAttrView(context: Context, attrView: AttrView) {
    //将每一个换肤控件的属性进行应用
    attrView.attrs.forEach {
        if (attrView.view is TextView) {
            if (it.attrName == "textColor") {
                //去皮肤包中寻找对应的资源
                attrView.view.setTextColor(SkinLoader.instance.getTextColor(context, it.resId))
            } else if (it.attrName == "text") {
                //去皮肤包中寻找对应的资源
                attrView.view.text = SkinLoader.instance.getText(context, it.resId)
            }
        }
    }
}
获取插件工程的资源只需要三步
1、通过主工程的资源id获取资源名字,类型
2、通过资源名字、类型去插件包中寻找对应的资源id
3、通过插件资源id,用插件Resources对象去读取插件资源
fun getText(context: Context, redId: Int): String {
    //找到插件工程的对应资源id
    val identifier = getIdentifier(context, redId)

    if (resource == null || identifier <= 0) {
        return context.getString(redId)
    }
    //获取插件工程的资源
    return resource!!.getString(identifier)
}

private fun getIdentifier(context: Context, redId: Int): Int {
    //主工程资源id->资源名字、类型->插件包中的资源id
    //R.color.black
    //black
    val resourceEntryName = context.resources.getResourceEntryName(redId)
    //color
    val resourceTypeName = context.resources.getResourceTypeName(redId)
    return resource?.getIdentifier(resourceEntryName, resourceTypeName, skinPkgName) ?: 0
}
Resources一些方法说明
//activity_main
Log.i(TAG, "${resources.getResourceEntryName(R.layout.activity_main)} ")
//org.learn.skinchangedemp:layout/activity_main
Log.i(TAG, "${resources.getResourceName(R.layout.activity_main)} ")
//org.learn.skinchangedemp
Log.i(TAG, "${resources.getResourcePackageName(R.layout.activity_main)} ")
//layout
Log.i(TAG, "${resources.getResourceTypeName(R.layout.activity_main)} ")
//资源id,packageName=插件包的包名
Log.i(TAG, "${resources.getIdentifier("activity_main", "layout", packageName)}")
支持手动设置属性,手动添加控件
同样的,换肤不仅仅需要支持xml中配置,也需要能动态添加,设置属性,通过上面的步骤其实也很简单,直接将控件封装成AttrView对象,属性封装成AttrItem即可。
fun onAddView(view: View) {
    val textView = TextView(this)

    val addAttr = layoutFactory2.dynamicAddSkin(textView)
        .addAttr("text", R.string.test_string)
        .addAttr("textColor", R.color.skin_test_color)

    mLL.addView(textView, ViewGroup.LayoutParams(
        ViewGroup.LayoutParams.MATCH_PARENT, ViewGroup.LayoutParams.WRAP_CONTENT
    ))
    layoutFactory2.changAttrView(this, addAttr)
}

//将控件封装成AttrView对象,然后添加到换肤的列表中
fun dynamicAddSkin(v: View): AttrView {
    val attrView = AttrView(v)
    attrViews.add(attrView)
    return attrView
}

fun changAttrView(context: Context, attrView: AttrView) {
    //将每一个换肤控件的属性进行应用
    attrView.attrs.forEach {
        if (attrView.view is TextView) {
            if (it.attrName == "textColor") {
                //去皮肤包中寻找对应的资源
                attrView.view.setTextColor(SkinLoader.instance.getTextColor(context, it.resId))
            } else if (it.attrName == "text") {
                //去皮肤包中寻找对应的资源
                attrView.view.text = SkinLoader.instance.getText(context, it.resId)
            }
        }
    }
}
方案特点:
1、自动化程度比较高,改造成本也低
2、存在一定侵入性
方案三:使用tag标记需要换肤的属性
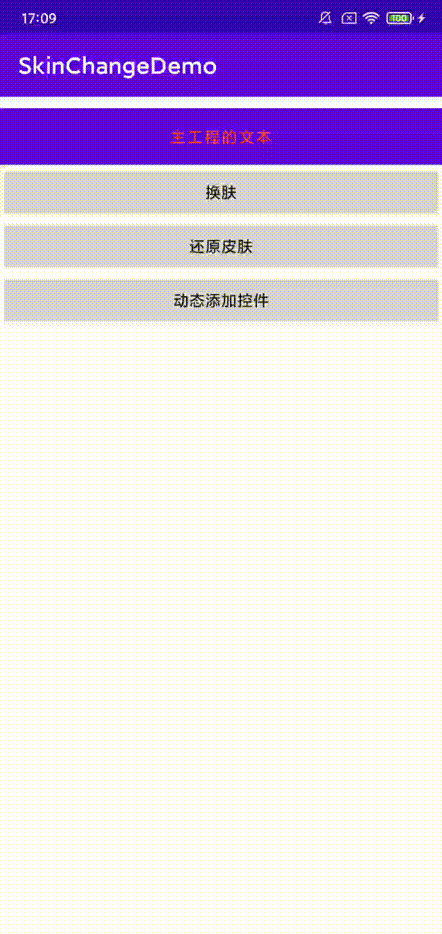
此方案其实与方案二的步骤非常相似,唯一不同的地方在于,方案二使用了layoutFactory去获取所有支持换肤的控件,本方案则是在控件上设置tag的方式来标记,方案二在创建布局的时候收集所有控件,性能上存在部分损耗,使用tag则是在换肤的时候,遍历控件树去修改属性。代表方案为AndroidChangeSkin
在xml中使用tag
<Button
    android:layout_width="match_parent"
    android:layout_height="50dp"
    android:layout_marginTop="10dp"
    android:background="#ffffff"
    android:gravity="center"
    android:tag="text=string/test_string|textColor=color/skin_test_color"
    android:text="@string/test_string"
    android:textColor="?attr/module_color" />
换肤的时候遍历视图树
private fun look(view: View) {
    if (view is ViewGroup) {
        for (i in 0 until view.childCount) {
            look(view.getChildAt(i))
        }
    }
    var tag = view.tag
    if (tag == null) {
        tag = view.getTag(R.id.skin_tag)
    }
    if (tag == null || tag !is String) {
        return
    }
    val attrView2 = AttrView2(view)

    val attrItem = tag.split("|")
    attrItem.forEach {
        val attrInfo = it.split("=")
        val kvAttr = attrInfo[1].split("/")
        attrView2.attrs.add(AttrItem2(attrInfo[0], kvAttr[1], kvAttr[0]))
    }
    mChangSkinViews.add(attrView2)
}
然后就是与方案二中一样,读取皮肤包资源咯
fun refreshUI() {
    mChangSkinViews.clear()
    look(findViewById(R.id.root_view))
    mChangSkinViews.forEach {
        if (it.view is TextView) {
            it.attrs.forEach { attr ->
                if (attr.attr == "textColor") {
                    //去皮肤包中寻找对应的资源
                    it.view.setTextColor(SkinLoader.instance.getTextColor(this, attr.attrName, attr.attrType))
                } else if (attr.attr == "text") {
                    //去皮肤包中寻找对应的资源
                    it.view.text = SkinLoader.instance.getText(this, attr.attrName, attr.attrType)
                }
            }
        }
    }
}
动态添加控件与方案二也差不多
fun onAddView(view: View) {
    val textView = TextView(this)
    textView.setText(getString(R.string.test_string))
    textView.setTextColor(resources.getColor(R.color.skin_test_color))
    textView.setTag(R.id.skin_tag, "text=string/test_string|textColor=color/skin_test_color")

    mLL.addView(textView, ViewGroup.LayoutParams(
        ViewGroup.LayoutParams.MATCH_PARENT, ViewGroup.LayoutParams.WRAP_CONTENT
    ))
    textView.setOnClickListener {
        mLL.removeView(it)
    }
    refreshUI()
}
方案特点:侵入性较低,但是使用、改造成本比较高
本文Demo地址:https://github.com/CB2Git/SkinChangeDemo
参考博文: