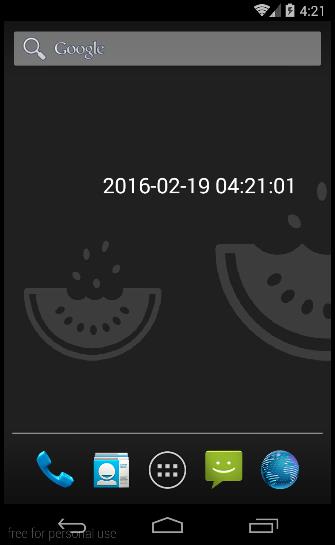
在AppWidget-桌面小组件(一)中介绍了下AppWidget的基本方法,下面我们来介绍如何使用AppWidget来做一个简单的桌面时钟效果。老规矩,先上demo效果图。这里只是简单的使用了一个TextView用于显示时间。
AppWidget使用步骤
1、准备好AppWidget的布局,这里我们使用的是一个TextView而已。
<?xml version="1.0" encoding="utf-8"?>
<LinearLayout xmlns:android="http://schemas.android.com/apk/res/android"
    android:layout_width="match_parent"
    android:layout_height="match_parent"
    android:orientation="vertical" >
    <TextView
        android:id="@+id/time"
        android:layout_width="wrap_content"
        android:layout_height="wrap_content"
        android:text="Widget显示时间"
        android:textColor="#ffffff"
        android:textSize="25sp" />
</LinearLayout>
2、继承AppWidgetProvider,并根据要求覆写需要使用的回调函数,这里为了演示,我全部覆写了。
public class MyAppWidget extends AppWidgetProvider {
	@Override
	public void onReceive(Context context, Intent intent) {
		super.onReceive(context, intent);
		//Log.v("MyAppWidget", "onReceive" + "接收广播,处理处理以后自动回调下面的函数");
	}
	@Override
	public void onEnabled(Context context) {
		super.onEnabled(context);
		Log.v("MyAppWidget", "onEnabled" + "第一个AppWidget被添加到桌面的时候调用");
	}
	@Override
	public void onDisabled(Context context) {
		super.onDisabled(context);
		Log.v("MyAppWidget", "onDisabled" + "所有AppWidget被删除的时候调用");
	}
	@Override
	public void onDeleted(Context context, int[] appWidgetIds) {
		super.onDeleted(context, appWidgetIds);
		Log.v("MyAppWidget", "onDeleted" + "AppWidget被删除的时候调用");
	}
	@Override
	public void onUpdate(Context context, AppWidgetManager appWidgetManager,int[] appWidgetIds) {
		super.onUpdate(context, appWidgetManager, appWidgetIds);
		Log.v("MyAppWidget", "onUpdate" + "更新的时候调用");
	}
}
关于各个回调函数的调用时机,在上一讲中已经说的很清楚了,这里注释中也注明了,自己测试下就知道了。
3、定义AppWidget的属性
定义AppWidget的属性,我们需要在res下新建名为xml的文件夹,在里面使用 appwidget-provider 标签定义AppWidget的属性。
<?xml version="1.0" encoding="utf-8"?>
<appwidget-provider xmlns:android="http://schemas.android.com/apk/res/android"
    android:initialLayout="@layout/widget_layout"
    android:minHeight="30dp"
    android:minWidth="200dp" >
</appwidget-provider>
更多属性设置请参看上一篇博客。
4、注册AppWidget
在上一篇博客中已经讲得很清楚了,AppWidget是基于广播机制的,广播是需要注册的,所以在AndroidManifest.xml文件中注册AppWidget。
<!-- 你的AppWidget包名+类名 -->
<receiver android:name="com.jay.myappwidget.MyAppWidget" >
    <intent-filter>
        <action android:name="android.appwidget.action.APPWIDGET_UPDATE" />
    </intent-filter>

    <!-- 你的AppWidget的配置文件名 -->
    <meta-data
        android:name="android.appwidget.provider"
        android:resource="@xml/widget_provider" />
</receiver>
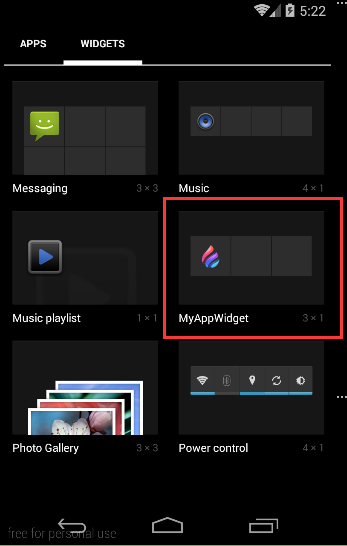
经过上面四步,我们就可以将AppWidget添加到桌面上了。下面的截图在小工具菜单中。
动态更新AppWidget
也许你已经完成了上面四步,可是添加到桌面后你会发现,根本就没有显示时间啊,显示的在布局文件中默认的text,别急,下面就来完成动态更新AppWidget产生时钟效果。
我们知道,广播运行在主线程(UI线程)中,不能进行耗时操作,而且广播的生命很短(更多关于广播的注意事项请点这里),所以不能在广播执行定时刷新操作,而桌面小组件在运行的时候,Activity也许没有运行,所以这里我们得使用后台服务Service,在Service中去定时刷新时间。关于Service的用法就不在赘述,需要的请查看Android四大组件之Service。下面直接贴出Service代码。
public class MyService extends Service {
	private Timer timer;
	private SimpleDateFormat mFormat;

	@Override
	public IBinder onBind(Intent intent) {
		return null;
	}

	/**
	 * 在服务被创建的时候创建一个定时器 使用定时器来更新AppWidget
	 */
	@Override
	public void onCreate() {
		super.onCreate();

		if (timer == null)
			timer = new Timer();
		timer.schedule(new TimerTask() {

			@Override
			public void run() {
				updateWidget();
			}
		}, 0, 1000);

		mFormat = new SimpleDateFormat("yyyy-MM-dd HH:mm:ss");
	}

	/**
	 * 销毁定时器
	 */
	@Override
	public void onDestroy() {
		super.onDestroy();
		if (timer != null)
			timer.cancel();
		timer = null;
	}

	/**
	 * 更新视图
	 */
	private void updateWidget() {
		RemoteViews views = new RemoteViews(getPackageName(),R.layout.widget_layout);
		views.setTextViewText(R.id.time, mFormat.format(new Date()));
		AppWidgetManager manager = AppWidgetManager.getInstance(getApplicationContext());
		ComponentName componentName = new ComponentName(getApplicationContext(), MyAppWidget.class);
		manager.updateAppWidget(componentName, views);

	}
}
更新视图需要一个AppWidgetManager和一个RemoteViews,上面的代码中的 updateWidget()函数就是主要的更新操作。
好了,定义好Service了什么时候使用呢?在上面的介绍中可以知道,在第一个AppWidget被添加的时候会调用onEnable,在最后一个AppWidget被删除的时候,会调用onDisable,所以我们在这两个函数中分别启动后台线程和停止后台线程。
开启后台线程
@Override
public void onEnabled(Context context) {
	super.onEnabled(context);
	context.startService(new Intent(context,MyService.class));
	Log.v("MyAppWidget", "onEnabled" + "第一个AppWidget被添加到桌面的时候调用");
}
关闭后台线程
@Override
public void onDisabled(Context context) {
	super.onDisabled(context);
	context.stopService(new Intent(context,MyService.class));
	Log.v("MyAppWidget", "onDisabled" + "所有AppWidget被删除的时候调用");
}
到此为止AppWidget的介绍就结束了,下面也许会介绍使用AppWidget制作一个天气预报的小应用,敬请关注。
Demo下载 : 360网盘 访问密码 ec81