前言
想要让自己的app能Duang的一下变得绚丽点,动画效果是必不可少的,还是老样子,前辈们已经总结出来的精髓就不再重复介绍了,直接贴出来自harvic880925的博客(传送门),这几篇博客主要系统的介绍了视图动画和属性动画的用法,包括自定义插值器(Interpolator)以及Evaluator等高级操作。本篇博客是以前辈的博客为基础的,介绍的是给ViewGroup动态增加控件时的动画。
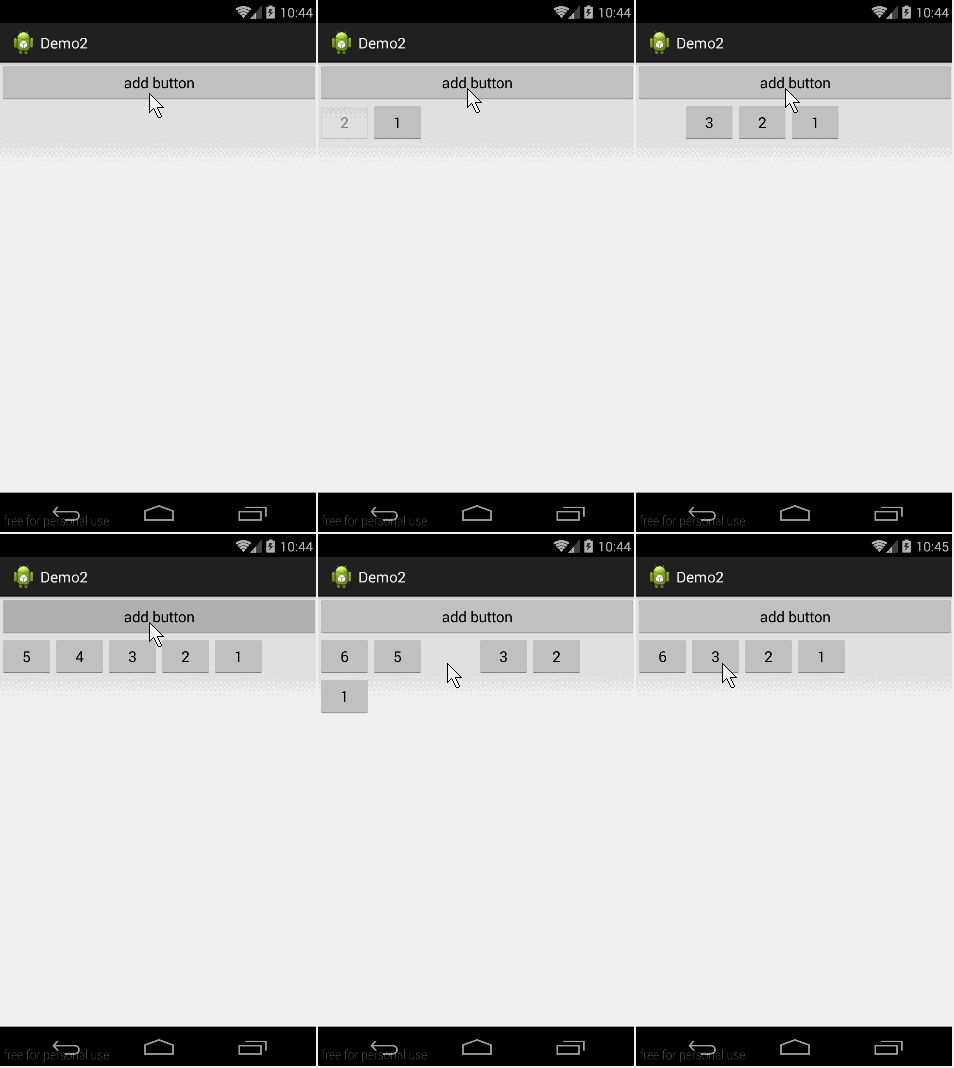
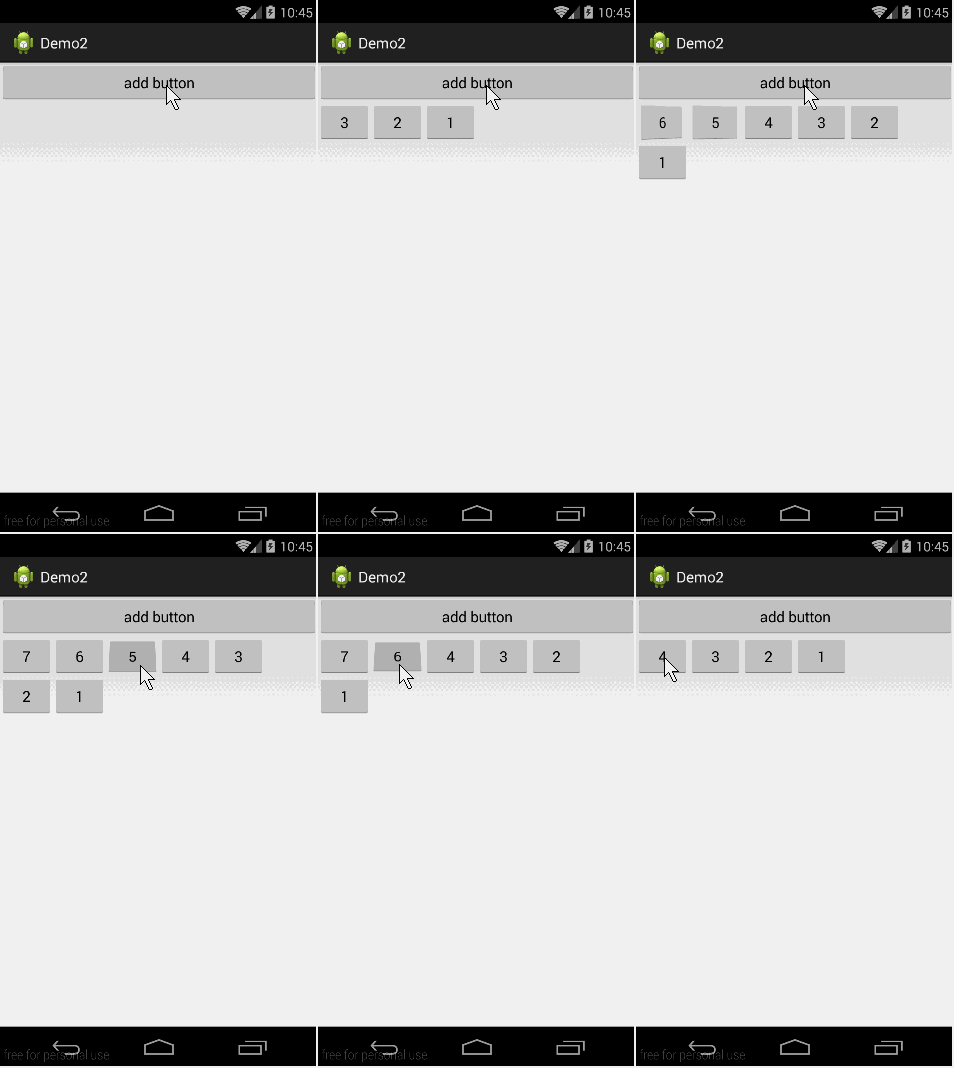
Duang Duang Duang对比图
默认(没有动画效果)

默认动画效果

自定义动画效果

具体实现
要实现这种效果,需要使用的是LayoutTransition,如果想要给ViewGroup实现默认的动画效果是很简单的,有两种实现方法,可以在布局文件中使用下面的属性
android:animateLayoutChanges="true"
或者在代码中给对应的ViewGroup使用setLayoutTransition(LayoutTransition )设置。如下,如果不设置动画,采用默认实现,效果和第一种方法一样。
// 实例化LayoutTransition属性
mLayoutTransition = new LayoutTransition();
mGridLayout.setLayoutTransition(mLayoutTransition);
如果我们想使用使用自定义的动画效果,可以直接给LayoutTransition使用LayoutTransition.setAnimator(int transitionType, Animator animator)设置动画,其中第一个参数transitionType的取值可以为以下四种。
- LayoutTransition.APPEARING 添加的控件的出现时动画
- LayoutTransition.CHANGE_APPEARING 当添加一个控件时,其他控件的动画
- LayoutTransition.DISAPPEARING 删除一个控件时的动画
- LayoutTransition.CHANGE_DISAPPEARING 当删除一个控件时,其他控件的动画
详细代码
布局文件是一个按钮以及一个GridLayout按照线性布局排列。
<LinearLayout xmlns:android="http://schemas.android.com/apk/res/android"
    xmlns:tools="http://schemas.android.com/tools"
    android:layout_width="match_parent"
    android:layout_height="match_parent"
    android:orientation="vertical" >
    <Button
        android:id="@+id/add"
        android:layout_width="match_parent"
        android:layout_height="wrap_content"
        android:text="add button" />
    <GridLayout
        android:id="@+id/grid"
        android:layout_width="match_parent"
        android:layout_height="match_parent"
        android:animateLayoutChanges="true" >
    </GridLayout>
</LinearLayout>
Activity代码片,关键是createCustomAnimations()方法,在这个方法中,我分别为上面说的四种情况设置了动画。
package com.jay.demo2;

import android.animation.Animator;
import android.animation.AnimatorListenerAdapter;
import android.animation.Keyframe;
import android.animation.LayoutTransition;
import android.animation.ObjectAnimator;
import android.animation.PropertyValuesHolder;
import android.os.Bundle;
import android.support.v7.app.ActionBarActivity;
import android.view.View;
import android.view.View.OnClickListener;
import android.widget.Button;
import android.widget.GridLayout;

public class MainActivity extends ActionBarActivity {

	private Button mAddBtn;
	private GridLayout mGridLayout;
	private LayoutTransition mLayoutTransition;

	@Override
	protected void onCreate(Bundle savedInstanceState) {
		super.onCreate(savedInstanceState);
		setContentView(R.layout.fragment_main);
		// 实例化控件
		mAddBtn = (Button) findViewById(R.id.add);
		mGridLayout = (GridLayout) findViewById(R.id.grid);
		mAddBtn.setOnClickListener(new OnClickListener() {

			@Override
			public void onClick(View v) {
				addBtn();
			}
		});
		// 实例化LayoutTransition属性
		mLayoutTransition = new LayoutTransition();
		// 设置GridLayout的基本属性
		mGridLayout.setColumnCount(5);
		mGridLayout.setLayoutTransition(mLayoutTransition);
		// 设置动画
		createCustomAnimations(mLayoutTransition);
	}

	/**
	 * 添加按钮,并给按钮添加点击时间,点击删除按钮
	 */
	private void addBtn() {
		Button btn = new Button(this);
		mGridLayout.addView(btn, 0);
		btn.setText(mGridLayout.getChildCount() + "");
		btn.setOnClickListener(new OnClickListener() {
			@Override
			public void onClick(View v) {
				mGridLayout.removeView(v);
			}
		});
	}

	/**
	 * 为LayoutTransition设置动画
	 *
	 * @param transition
	 *            传入的动画
	 */
	private void createCustomAnimations(LayoutTransition transition) {
		// Changing while Adding
		PropertyValuesHolder pvhLeft = PropertyValuesHolder.ofInt("left", 0, 1);
		PropertyValuesHolder pvhTop = PropertyValuesHolder.ofInt("top", 0, 1);
		PropertyValuesHolder pvhRight = PropertyValuesHolder.ofInt("right", 0,
				1);
		PropertyValuesHolder pvhBottom = PropertyValuesHolder.ofInt("bottom",
				0, 1);
		PropertyValuesHolder pvhScaleX = PropertyValuesHolder.ofFloat("scaleX",
				1f, 0f, 1f);
		PropertyValuesHolder pvhScaleY = PropertyValuesHolder.ofFloat("scaleY",
				1f, 0f, 1f);
		ObjectAnimator customChangingAppearingAnim = ObjectAnimator
				.ofPropertyValuesHolder(this, pvhScaleX, pvhLeft, pvhTop,
						pvhRight, pvhBottom, pvhScaleY)
				.setDuration(
						transition
								.getDuration(LayoutTransition.CHANGE_APPEARING));
		customChangingAppearingAnim.addListener(new AnimatorListenerAdapter() {
			public void onAnimationEnd(Animator anim) {
				View view = (View) ((ObjectAnimator) anim).getTarget();
				view.setScaleX(1f);
				view.setScaleY(1f);
			}
		});

		// Changing while Removing
		Keyframe kf0 = Keyframe.ofFloat(0f, 0f);
		Keyframe kf1 = Keyframe.ofFloat(.9999f, 360f);
		Keyframe kf2 = Keyframe.ofFloat(1f, 0f);
		PropertyValuesHolder pvhRotation = PropertyValuesHolder.ofKeyframe(
				"rotation", kf0, kf1, kf2);
		ObjectAnimator customChangingDisappearingAnim = ObjectAnimator
				.ofPropertyValuesHolder(this, pvhLeft, pvhTop, pvhRight,
						pvhBottom, pvhRotation)
				.setDuration(
						transition
								.getDuration(LayoutTransition.CHANGE_DISAPPEARING));
		customChangingDisappearingAnim
				.addListener(new AnimatorListenerAdapter() {
					public void onAnimationEnd(Animator anim) {
						View view = (View) ((ObjectAnimator) anim).getTarget();
						view.setRotation(0f);
					}
				});

		// Adding
		ObjectAnimator customAppearingAnim = ObjectAnimator.ofFloat(null,
				"rotationY", 90f, 0f).setDuration(
				transition.getDuration(LayoutTransition.APPEARING));
		customAppearingAnim.addListener(new AnimatorListenerAdapter() {
			public void onAnimationEnd(Animator anim) {
				View view = (View) ((ObjectAnimator) anim).getTarget();
				view.setRotationY(0f);
			}
		});

		// Removing
		ObjectAnimator customDisappearingAnim = ObjectAnimator.ofFloat(null,
				"rotationX", 0f, 90f).setDuration(
				transition.getDuration(LayoutTransition.DISAPPEARING));
		customDisappearingAnim.addListener(new AnimatorListenerAdapter() {
			public void onAnimationEnd(Animator anim) {
				View view = (View) ((ObjectAnimator) anim).getTarget();
				view.setRotationX(0f);
			}
		});

		transition.setAnimator(LayoutTransition.DISAPPEARING,
				customDisappearingAnim);
		transition.setAnimator(LayoutTransition.APPEARING, customAppearingAnim);
		transition.setAnimator(LayoutTransition.CHANGE_APPEARING,
				customChangingAppearingAnim);
		transition.setAnimator(LayoutTransition.CHANGE_DISAPPEARING,
				customChangingDisappearingAnim);
	}
}
上面所写的四种情况中,有两种情况非常特殊,就是LayoutTransition.CHANGE_APPEARING 以及 LayoutTransition.CHANGE_DISAPPEARING动画设置方法,必须和上面设置的方法一样,不然不会显示出预期的效果。
LayoutTransition.CHANGE_APPEARING得使用如下方法。
//Changing while Adding
PropertyValuesHolder pvhLeft =  PropertyValuesHolder.ofInt("left", 0, 1);
PropertyValuesHolder pvhTop = PropertyValuesHolder.ofInt("top", 0, 1);
PropertyValuesHolder pvhRight = PropertyValuesHolder.ofInt("right", 0, 1);
PropertyValuesHolder pvhBottom =  PropertyValuesHolder.ofInt("bottom", 0, 1);
PropertyValuesHolder pvhScaleX = ropertyValuesHolder.ofFloat("scaleX", 1f, 0f, 1f);
PropertyValuesHolder pvhScaleY = PropertyValuesHolder.ofFloat("scaleY", 1f, 0f, 1f);
final ObjectAnimator changeIn = ObjectAnimator.ofPropertyValuesHolder( this, pvhLeft, pvhTop, pvhRight, pvhBottom, pvhScaleX, pvhScaleY).
        setDuration(mTransitioner.getDuration(LayoutTransition.CHANGE_APPEARING));
mTransitioner.setAnimator(LayoutTransition.CHANGE_APPEARING, changeIn);
changeIn.addListener(new AnimatorListenerAdapter() {
    public void onAnimationEnd(Animator anim) {
        View view = (View) ((ObjectAnimator) anim).getTarget();
        view.setScaleX(1f);
        view.setScaleY(1f);
    }
});
LayoutTransition.CHANGE_DISAPPEARING得使用如下方法。
//Changing while Removing
Keyframe kf0 = Keyframe.ofFloat(0f, 0f);
Keyframe kf1 = Keyframe.ofFloat(.9999f, 360f);
Keyframe kf2 = Keyframe.ofFloat(1f, 0f);
PropertyValuesHolder pvhRotation = PropertyValuesHolder.ofKeyframe("rotation", kf0, kf1, kf2);
final ObjectAnimator changeOut = ObjectAnimator.ofPropertyValuesHolder(this, pvhLeft, pvhTop, pvhRight, pvhBottom, pvhRotation).
        setDuration(mTransitioner.getDuration(LayoutTransition.CHANGE_DISAPPEARING));
mTransitioner.setAnimator(LayoutTransition.CHANGE_DISAPPEARING, changeOut);
changeOut.addListener(new AnimatorListenerAdapter() {
    public void onAnimationEnd(Animator anim) {
        View view = (View) ((ObjectAnimator) anim).getTarget();
        view.setRotation(0f);
    }
});
题外话
在我们的Android模拟器中,往往存在着一个ApiDemos的App,这个App里面分类别演示了很多功能,源码在SDK的安装目录下\sdk\samples\任意一个版本的SDK下,通过这些官方提供的文档,我们可以很清楚的知道具体的实现过程。
Demo下载 : 360云盘 访问密码 3b8f